 Writer:
はしもも
 Translator:
[Machine translation]
"Origami" can fold various things from flat to three-dimensional depending on the folding method.
You can focus because you use your hands and head!
This time, I will make hydrangea flowers and butterflies. Let's make hydrangea leaves!

How to fold a hydrangea (flower)
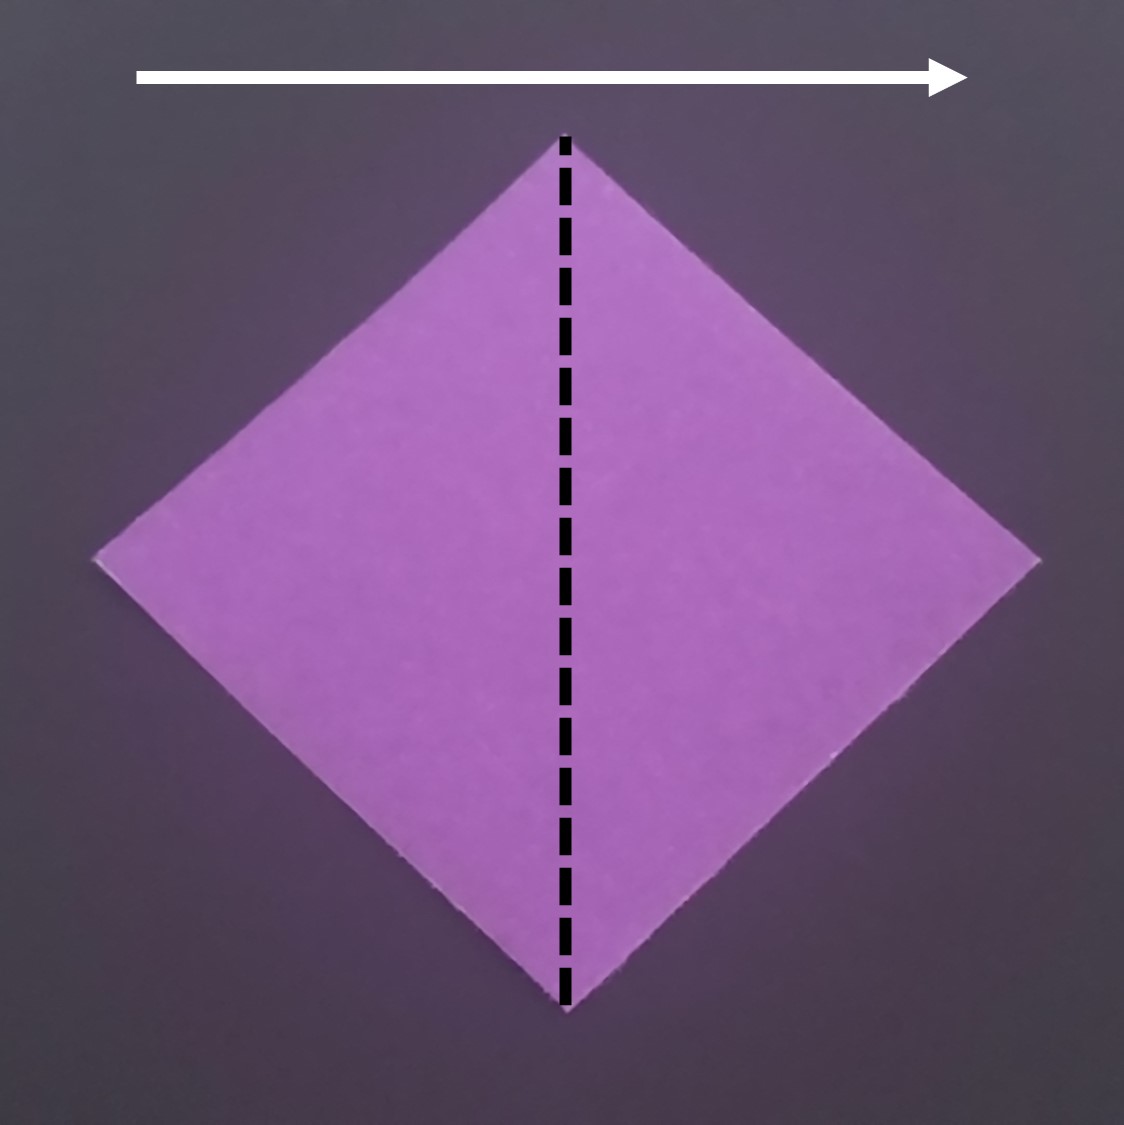
Hydrangea flowers are made with a small origami paper.
This time, I used a 5cm x 5cm prepared by cutting a colored origami on one side.
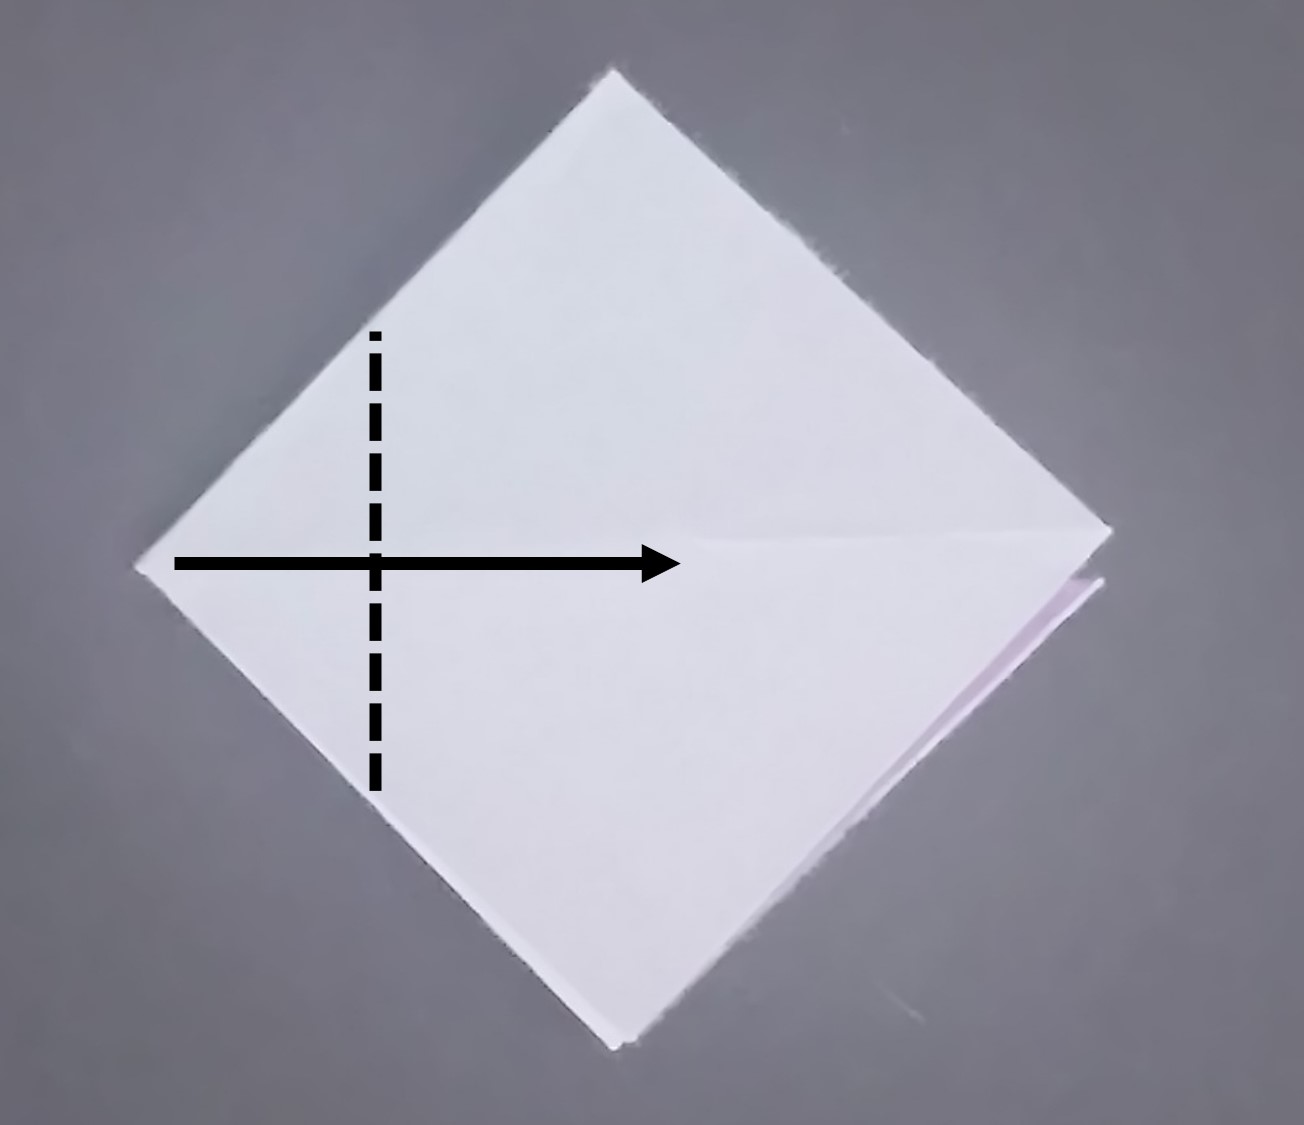
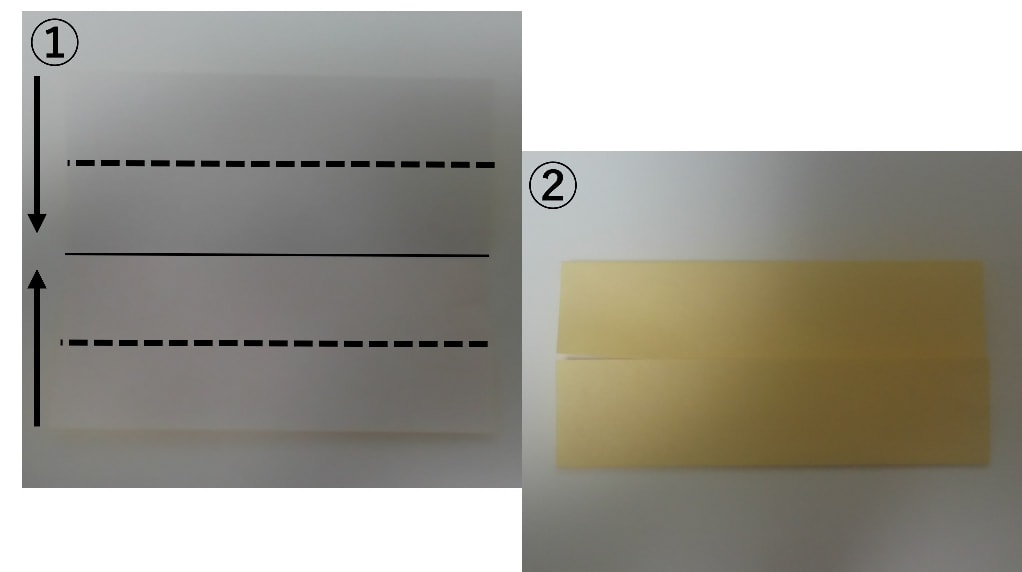
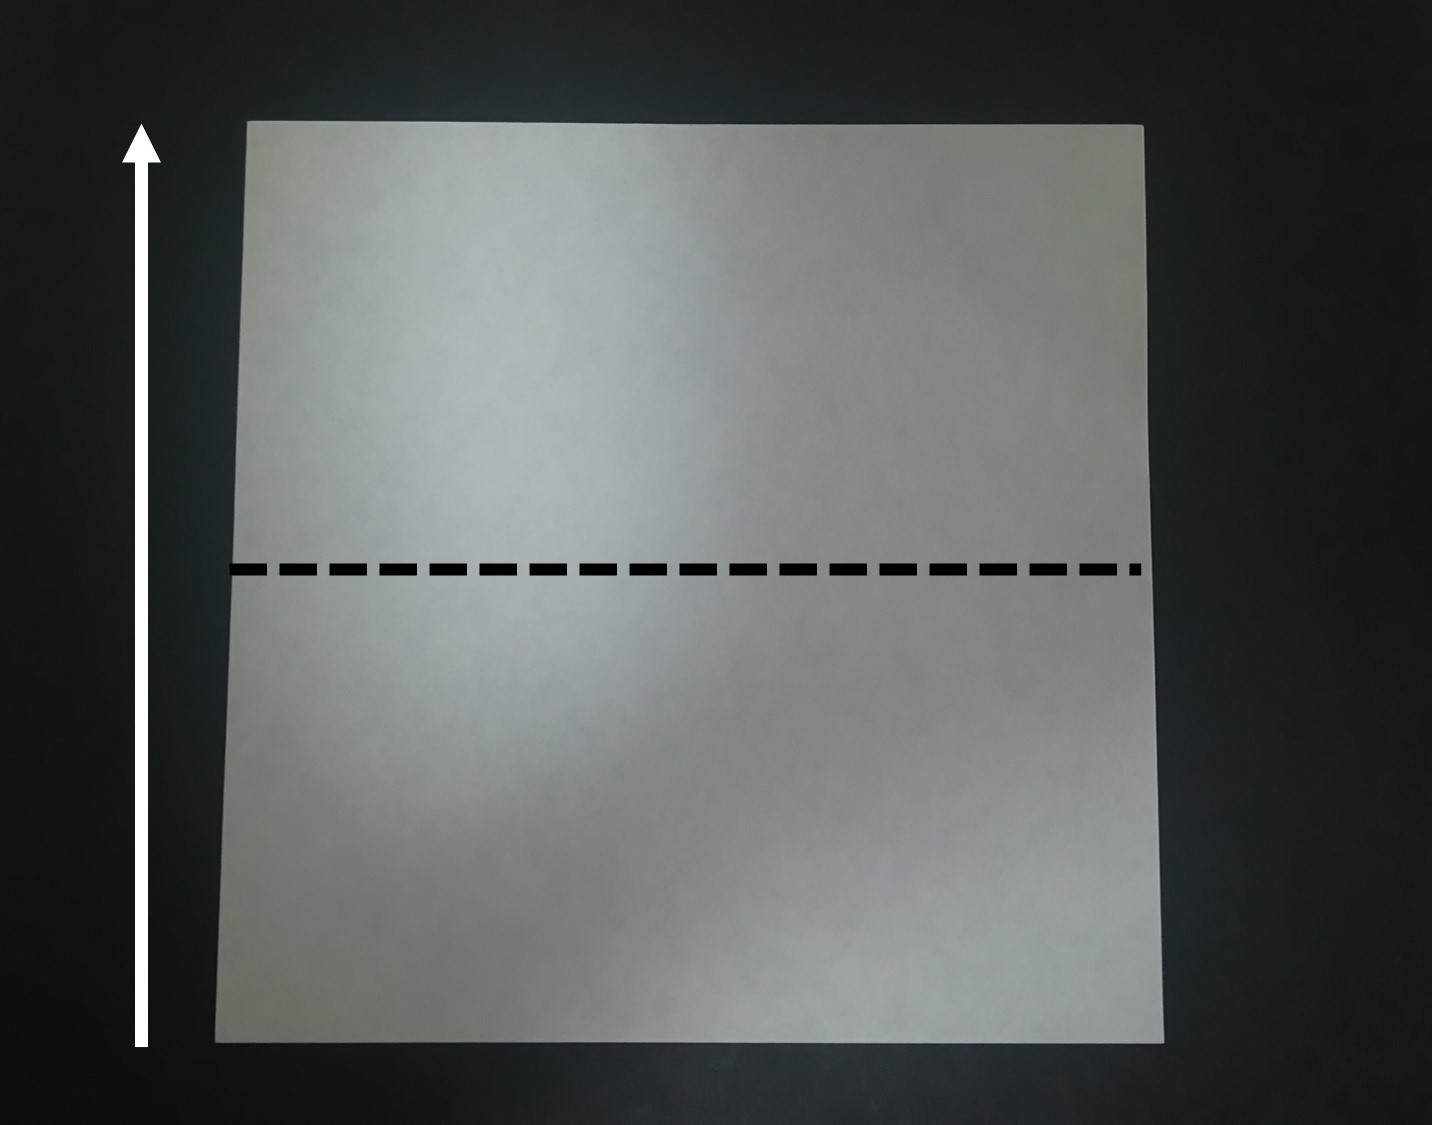
1. The front (color) side faces up. Fold it in the direction of the arrow at the half position (broken line).
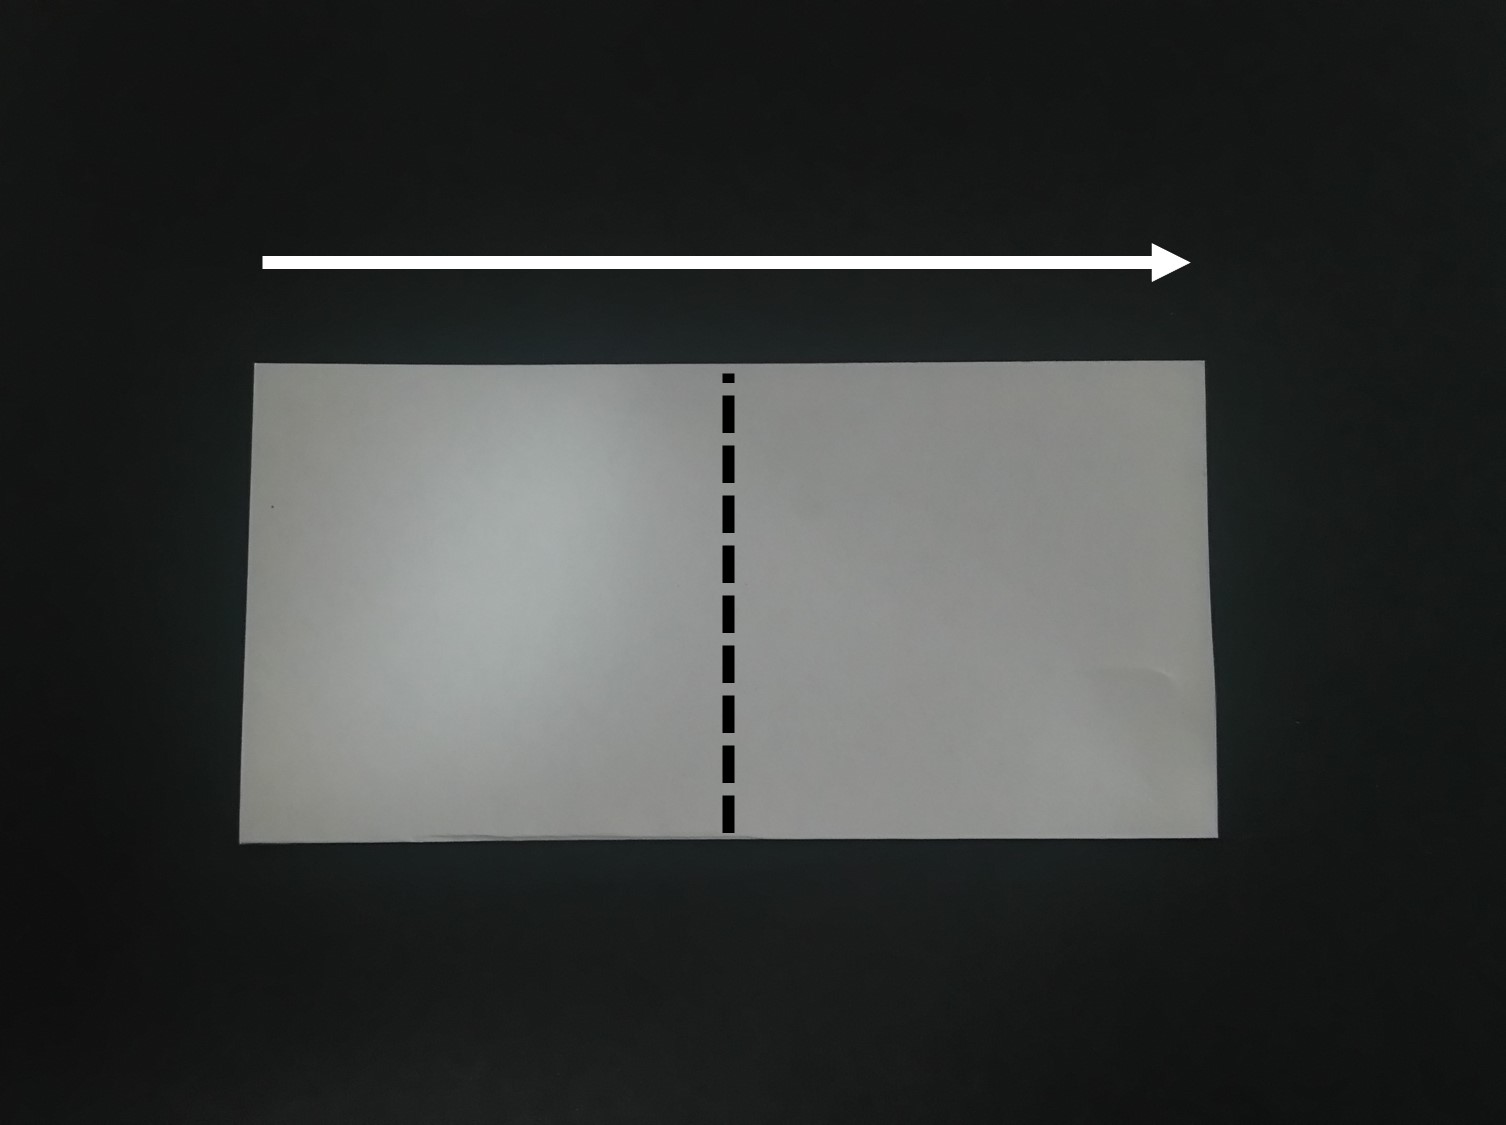
2. Fold it toward the arrow at the half position (broken line).
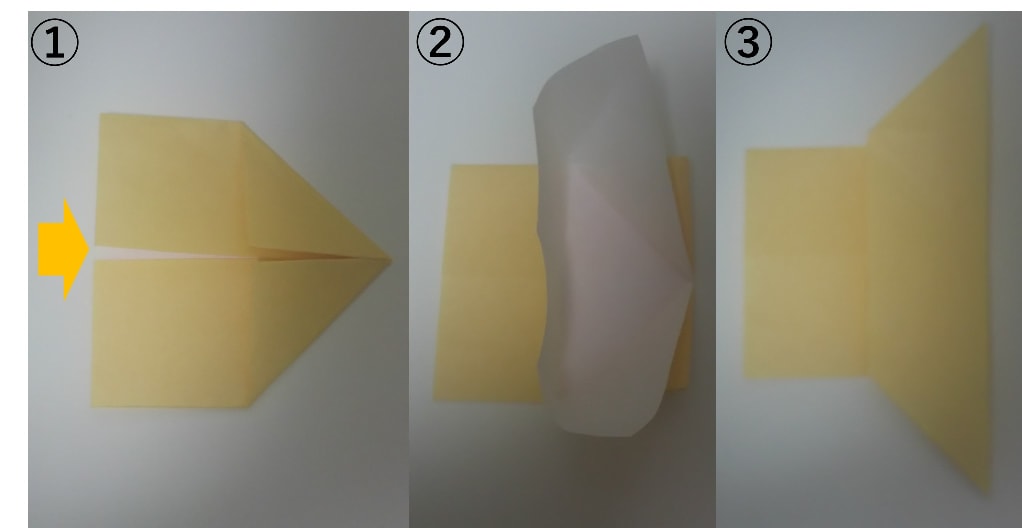
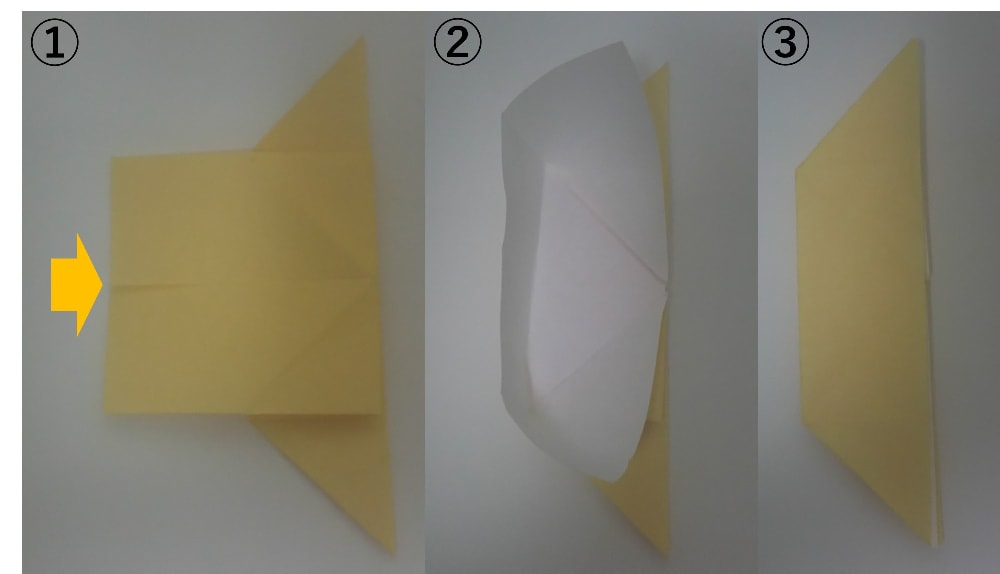
3. Open it while inflating the arrow. Do the same for the other side.
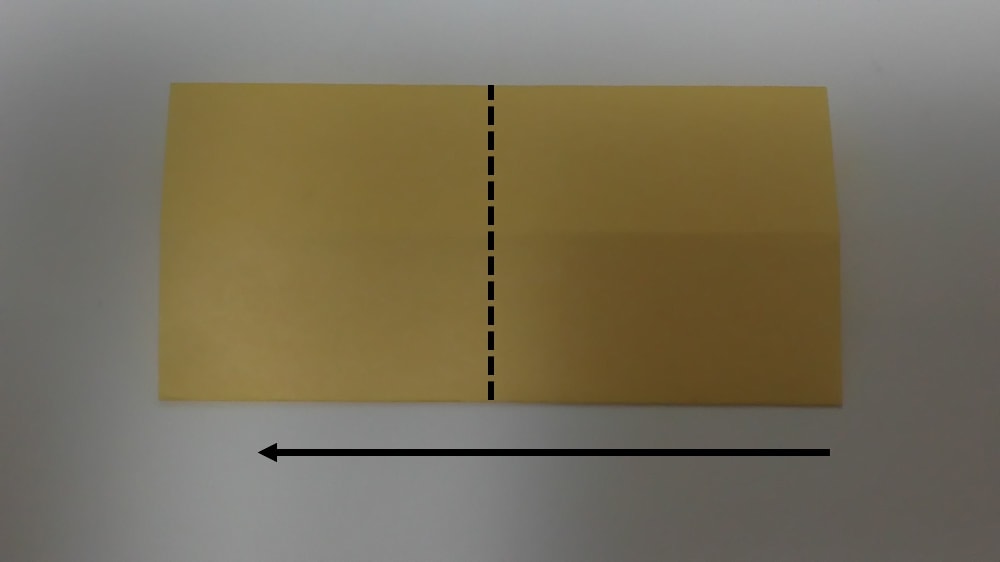
4. Fold it toward the arrow at the broken line. (The position of the broken line is roughly (1/4 to 1/3 width of the whole), there is no problem)
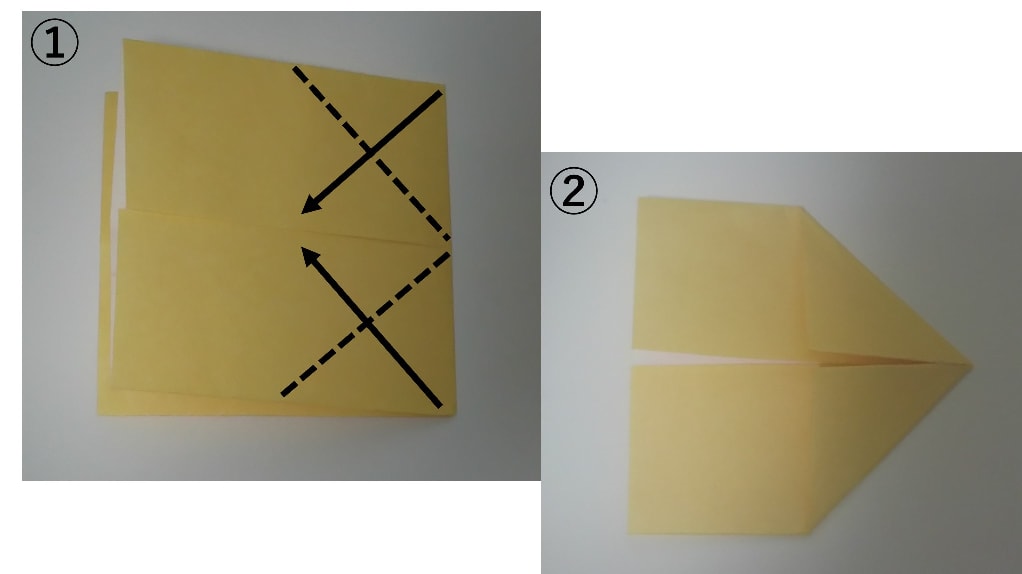
5. Open it while inflating the arrow. Open the other side of ③ and fold it.
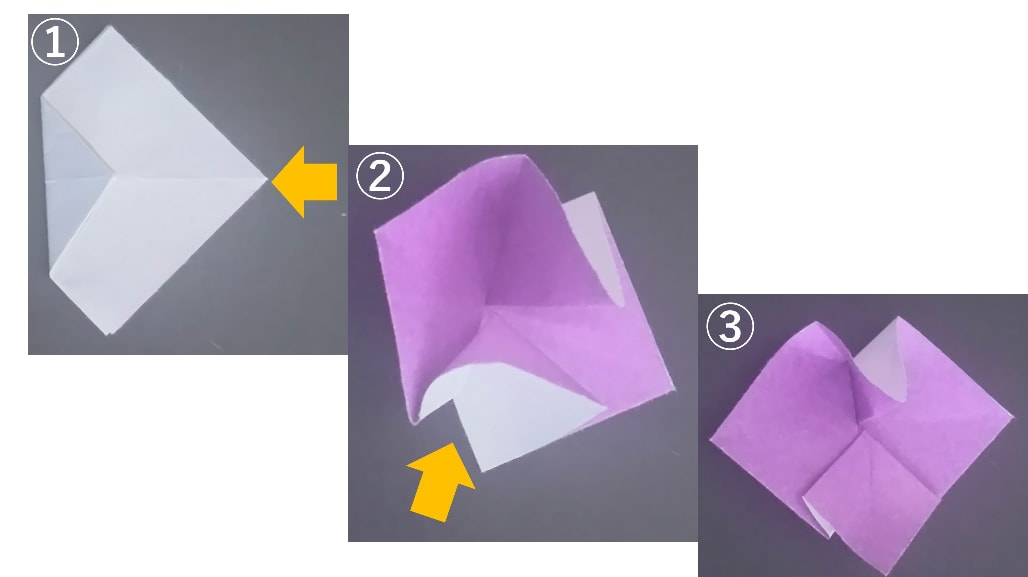
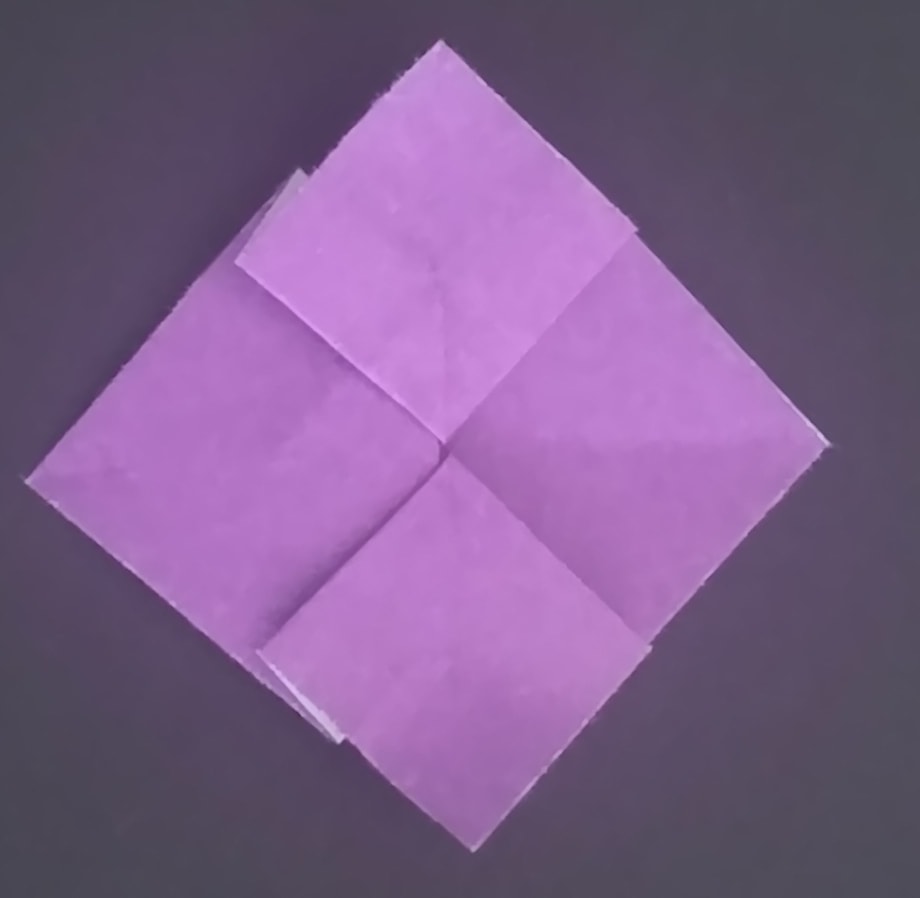
6. The flower part is completed! ! Follow the same procedure to make the flower part. The number to make is up to you. Let's make a good balance so that it looks like a hydrangea!
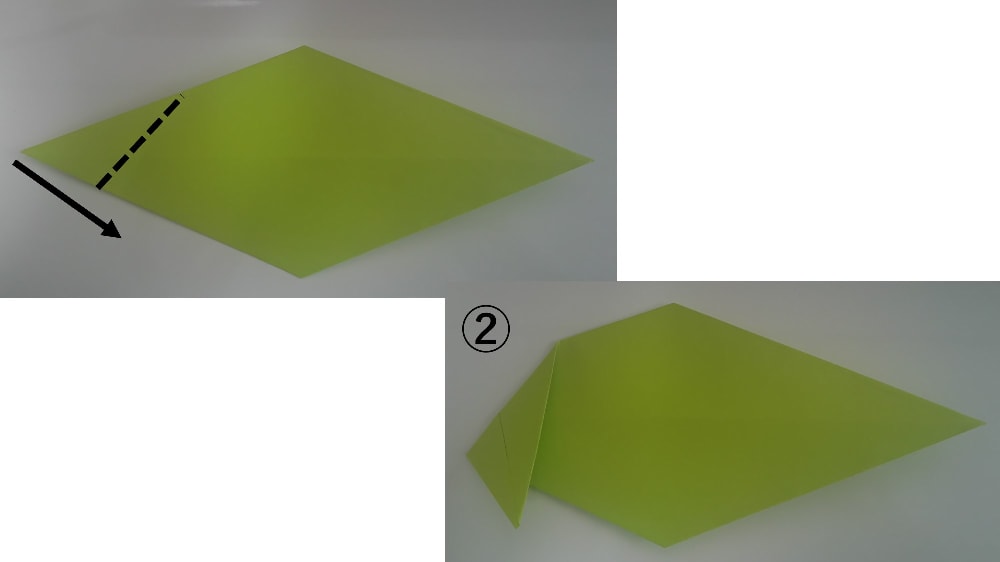
How to fold a leaf
For the leaves, we used a large 15cm x 15cm double-sided colored origami. Of course, you can also make a one-sided color origami.
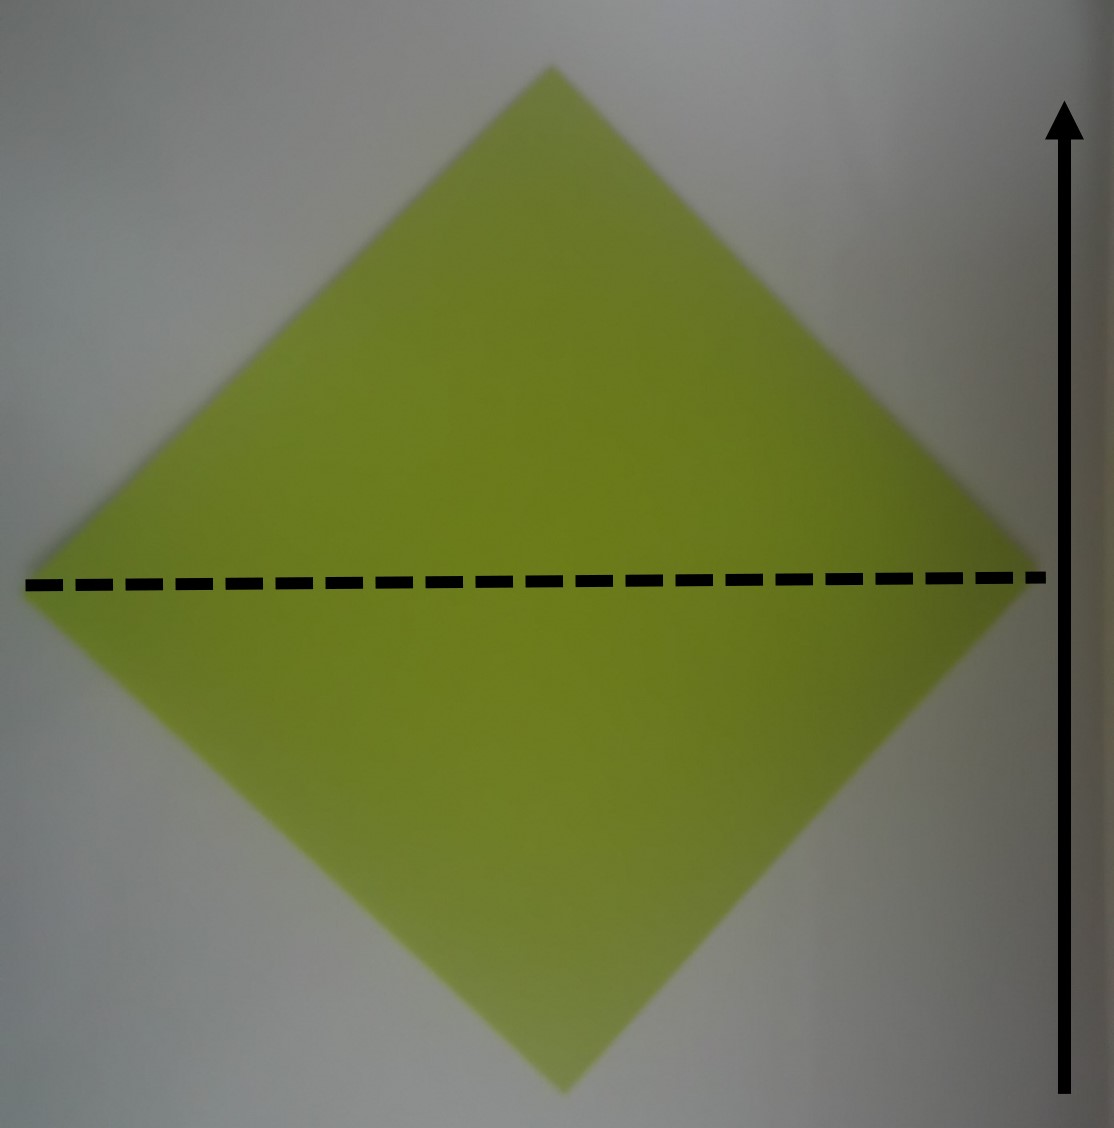
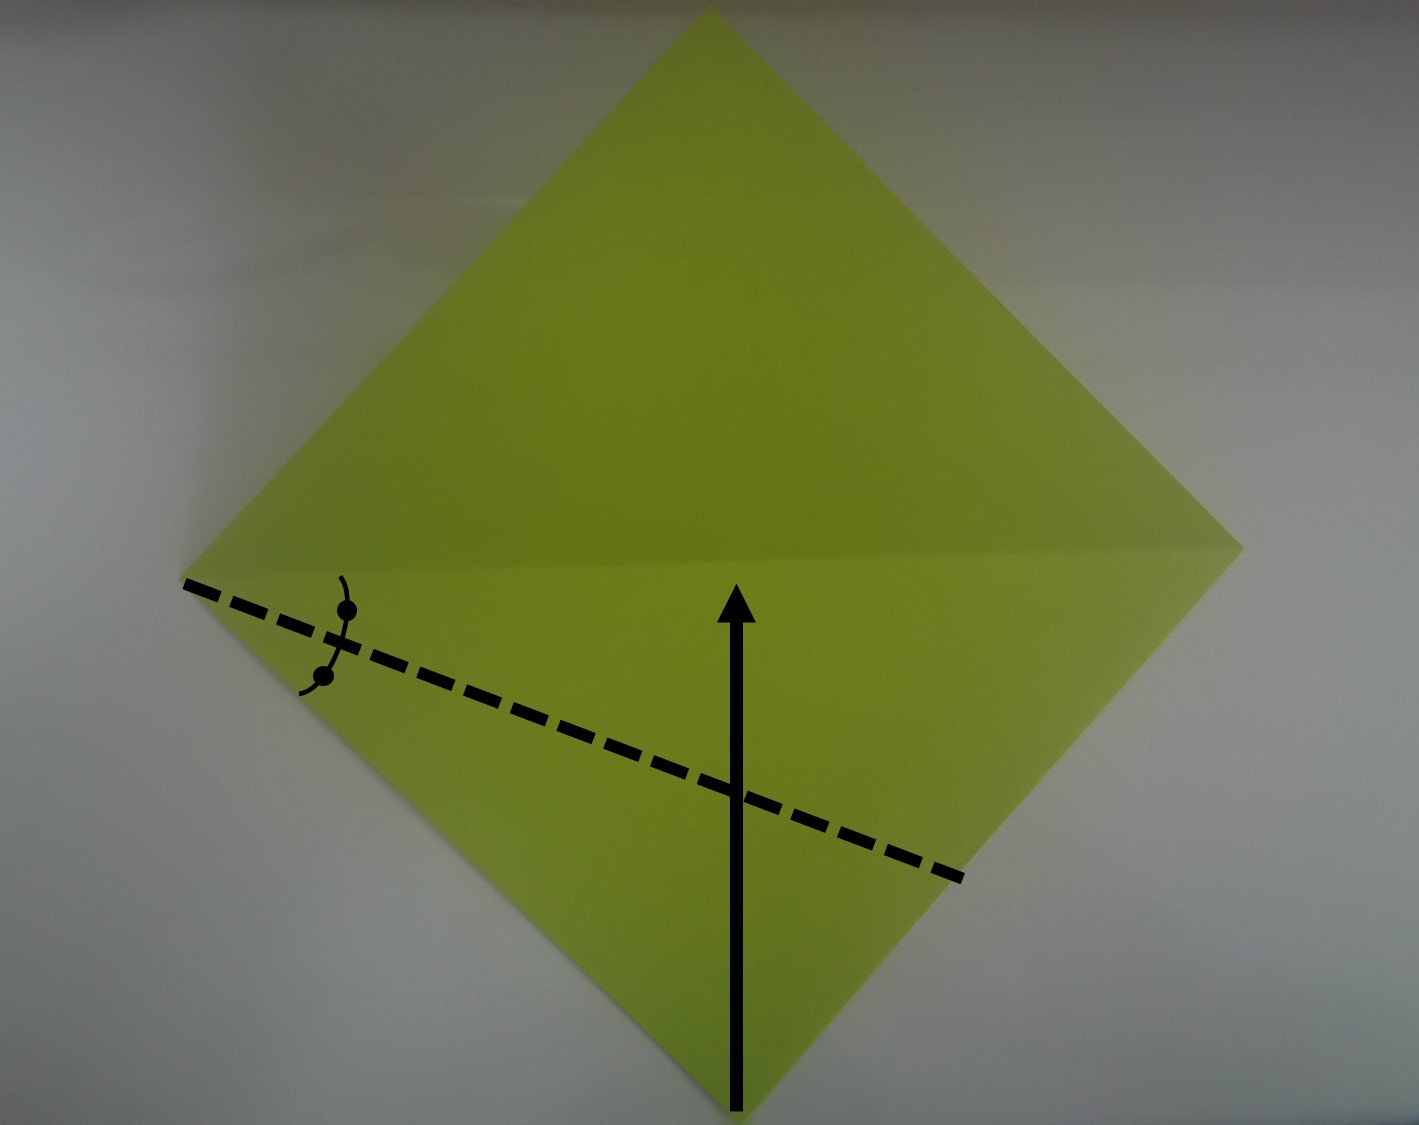
1. Make a crease at the half position (broken line) in the direction of the arrow. (For the one-sided color, the back (white) side should face up.)
2. Fold it toward the arrow at the half position (broken line) with reference to the fold position.
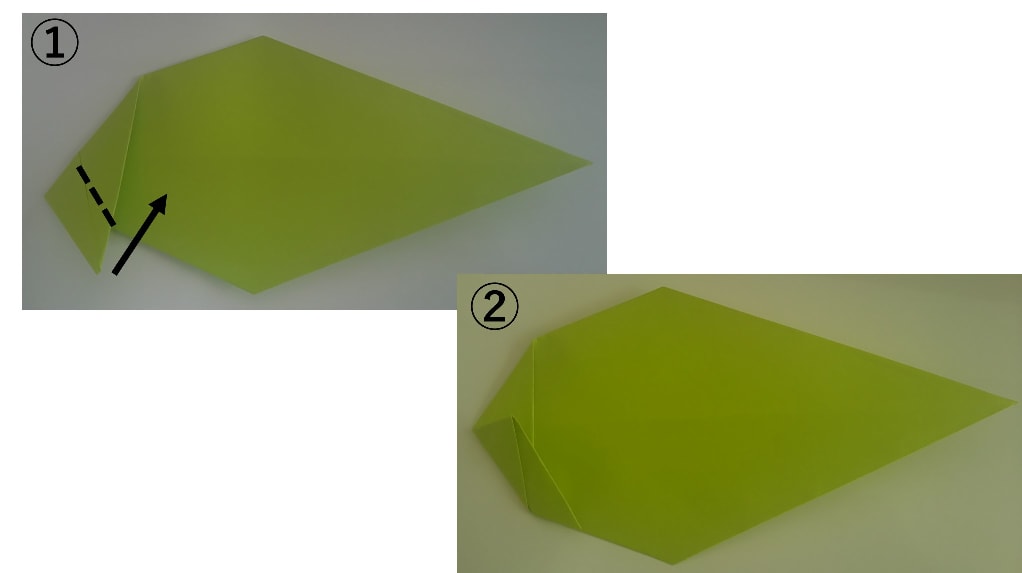
3. Fold it the same way for the other side too.
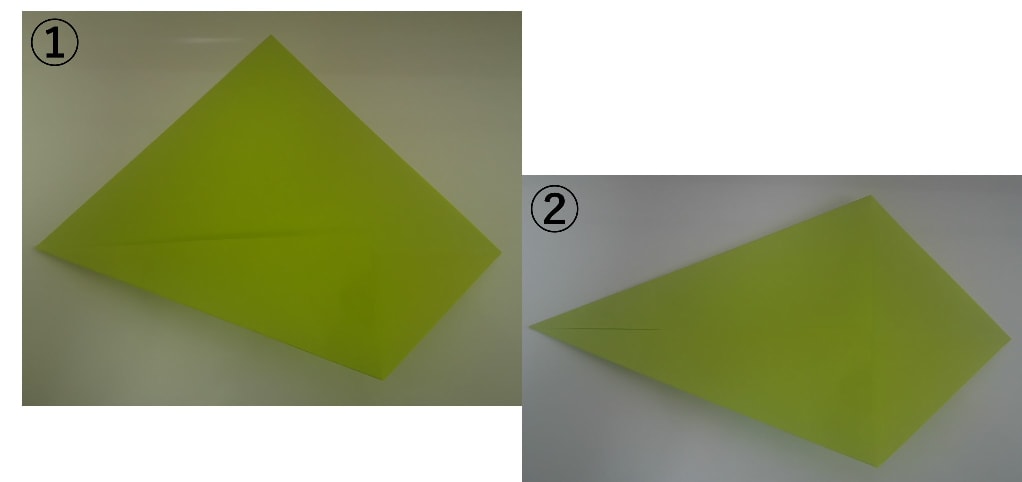
4. Fold it toward the arrow at the half position (broken line) with reference to the fold position. Fold it the same way for the other side too.
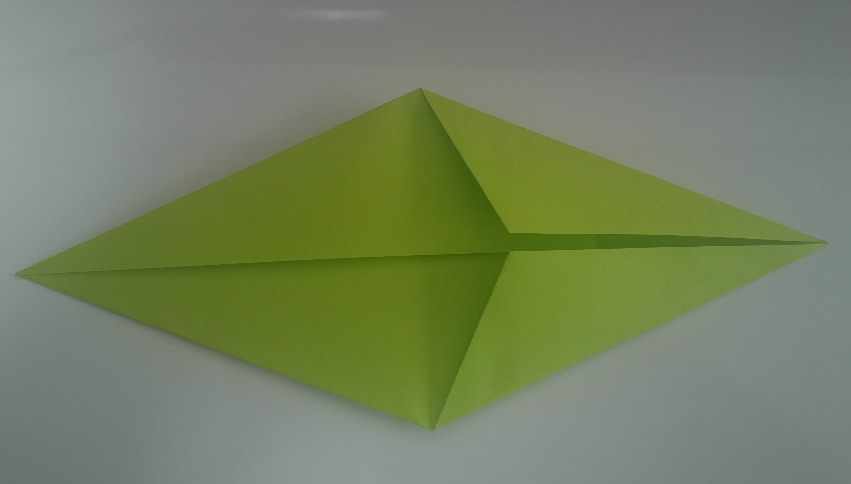
5. If you fold both, it will look like this. Turn it over.
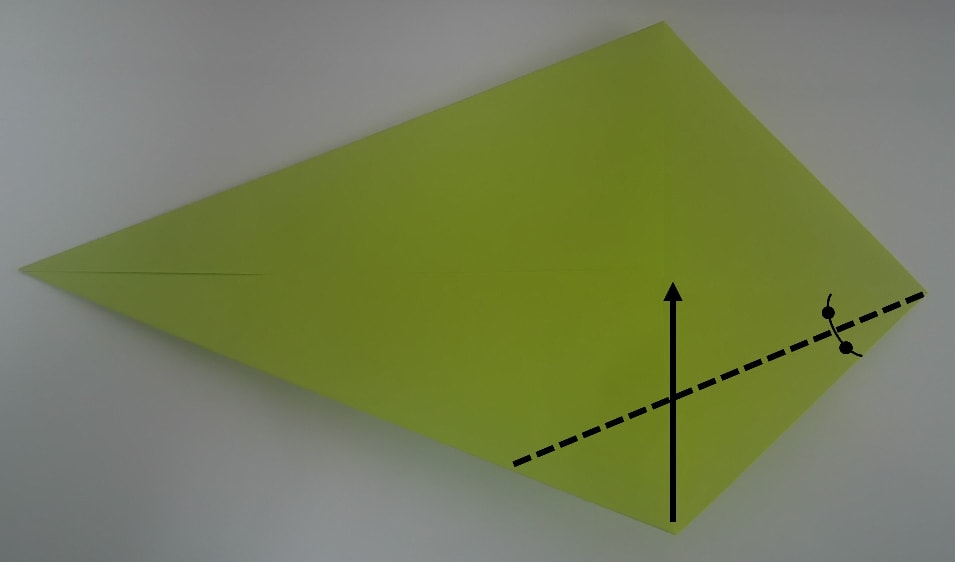
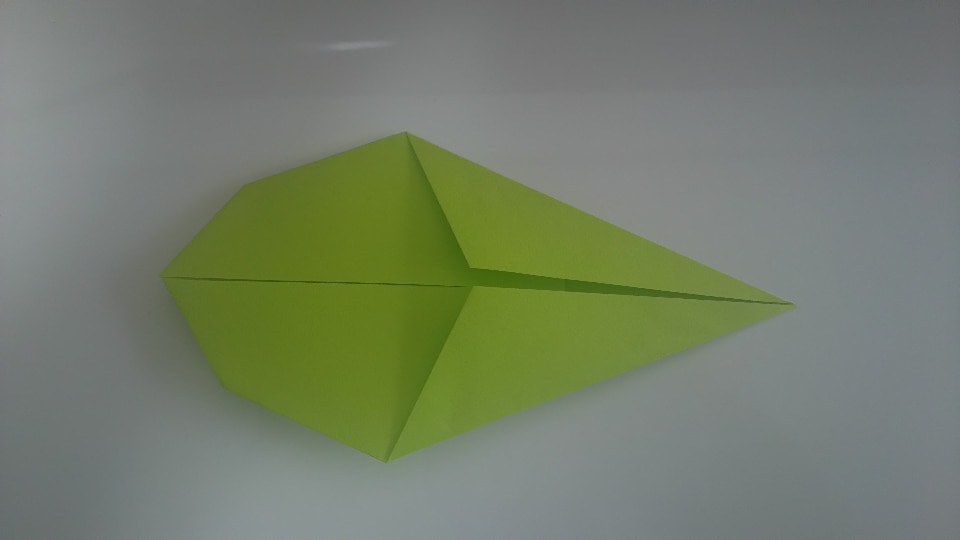
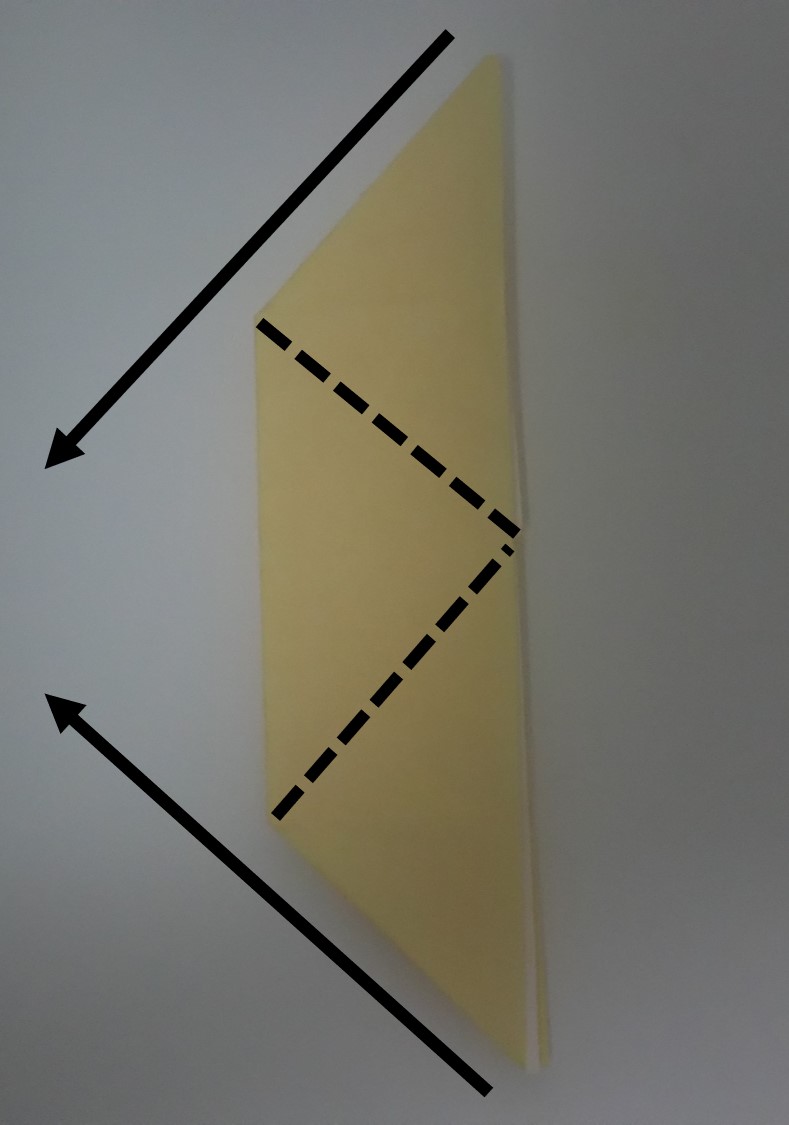
6. Fold it toward the arrow at the broken line. (The position of the broken line is almost no problem)
7. Fold it toward the arrow at the broken line.
8. Turn it over and the leaves are ready.
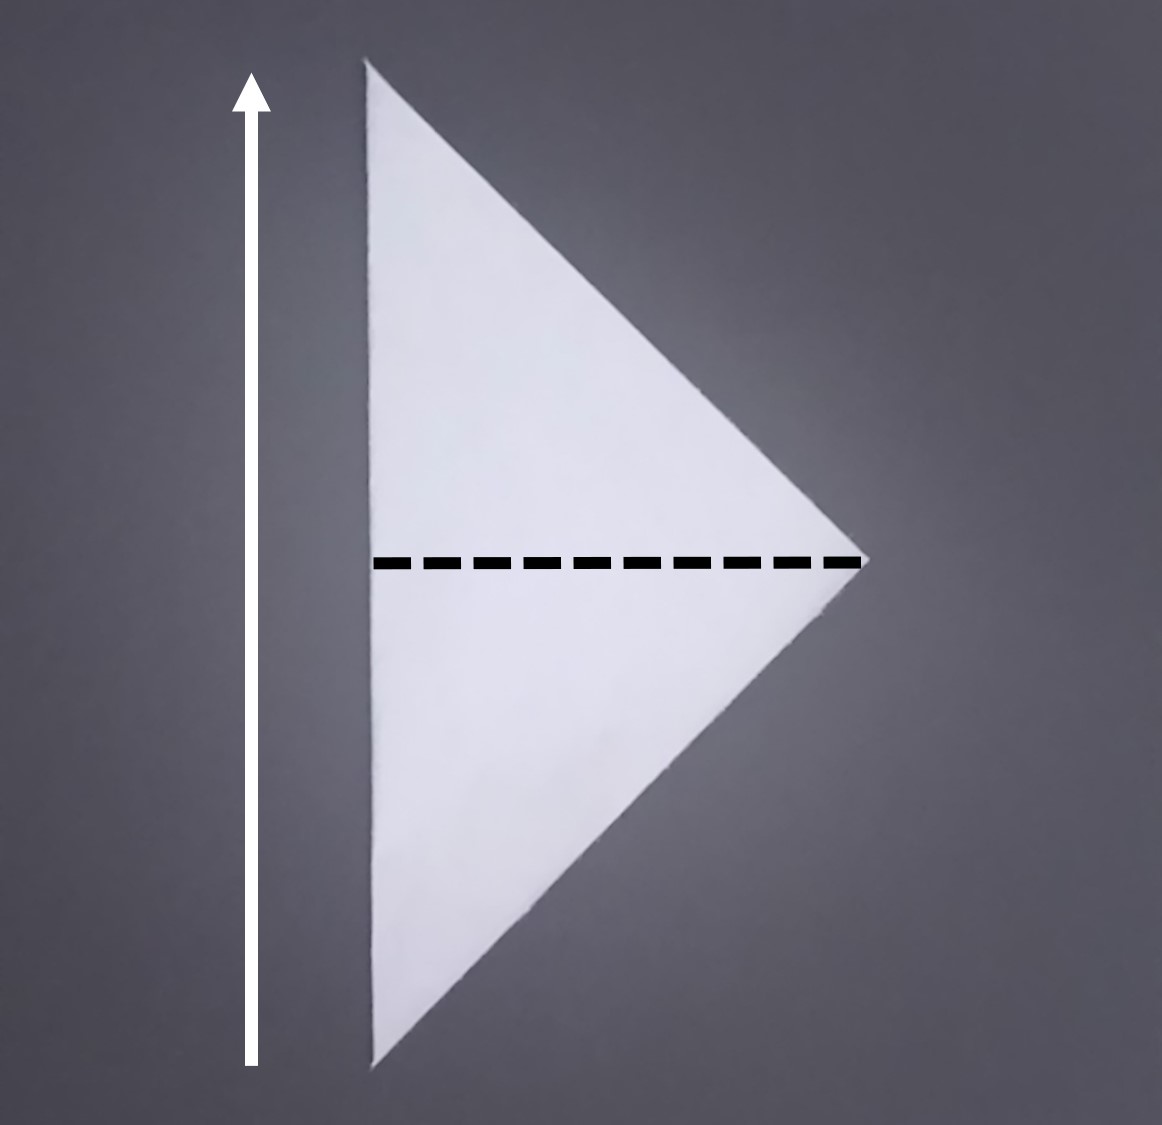
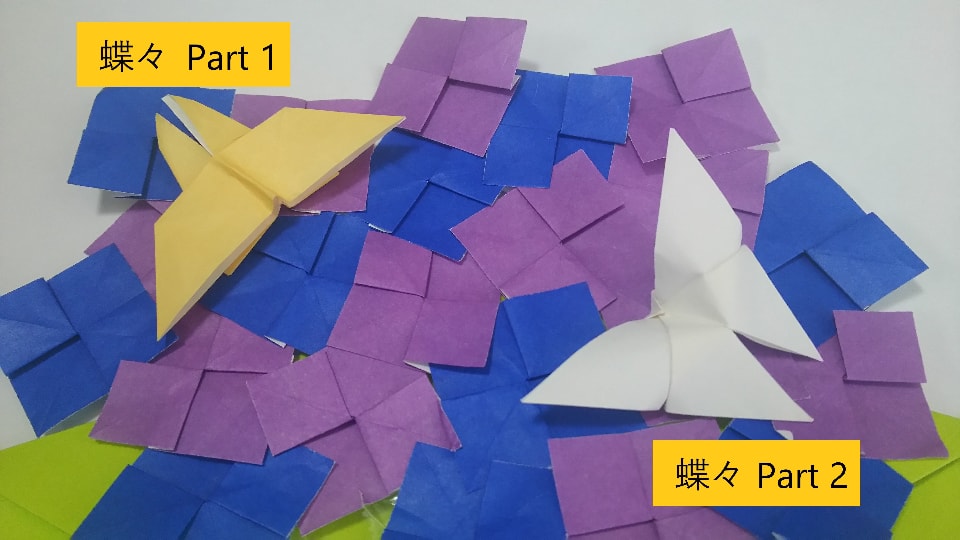
How to fold a butterfly(Part 1)
I folded two kinds of butterflies.
Both used a 7.5cm x 7.5xm single-sided colored origami.
1. The back (white) side is facing up. Make a crease at the half position (solid line). Fold it along the dotted line toward the crease.
2. Turn it over. Fold it in the direction of the arrow at the half position (broken line).
3. Fold it in the direction of the arrow at the broken line.
4. Open it while inflating the arrow.
5. Turn it over. Fold it as you did in step 4.
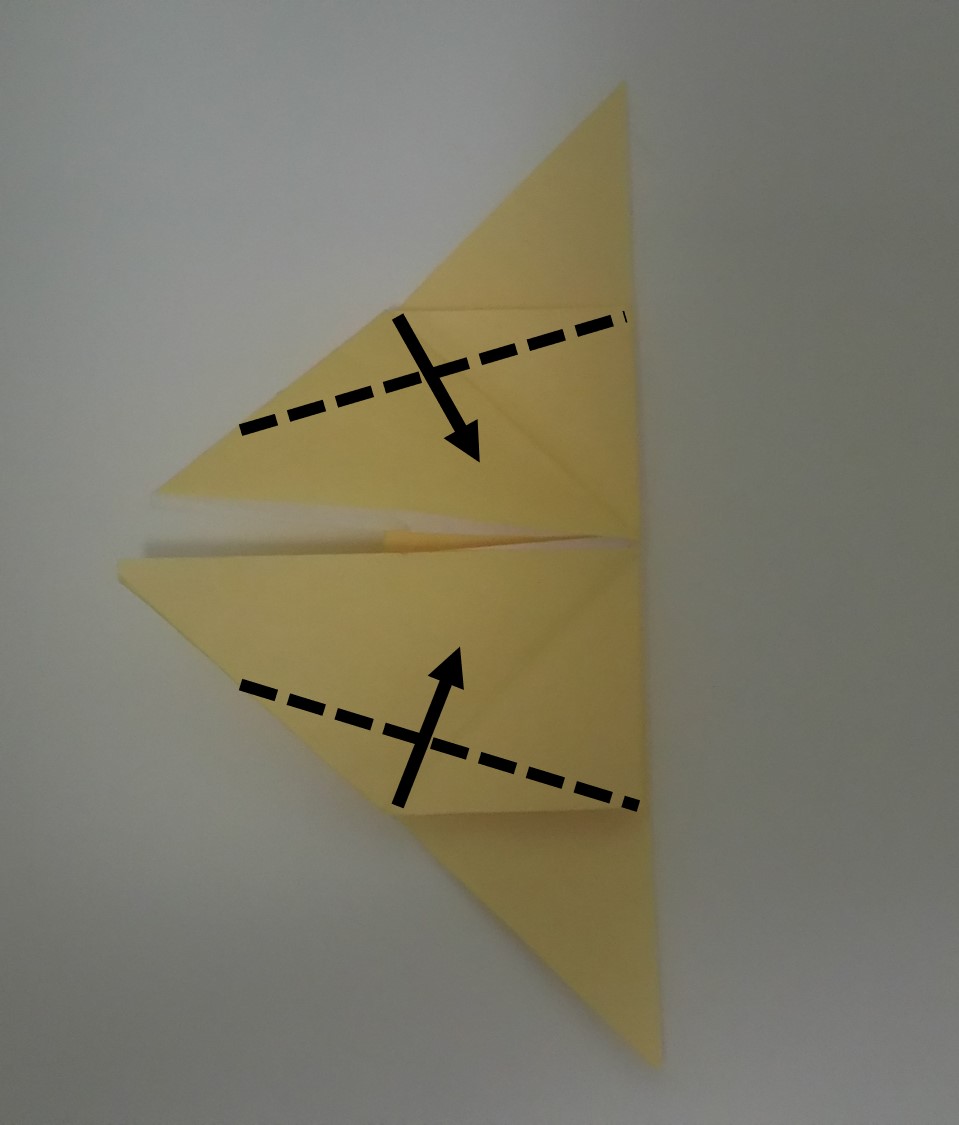
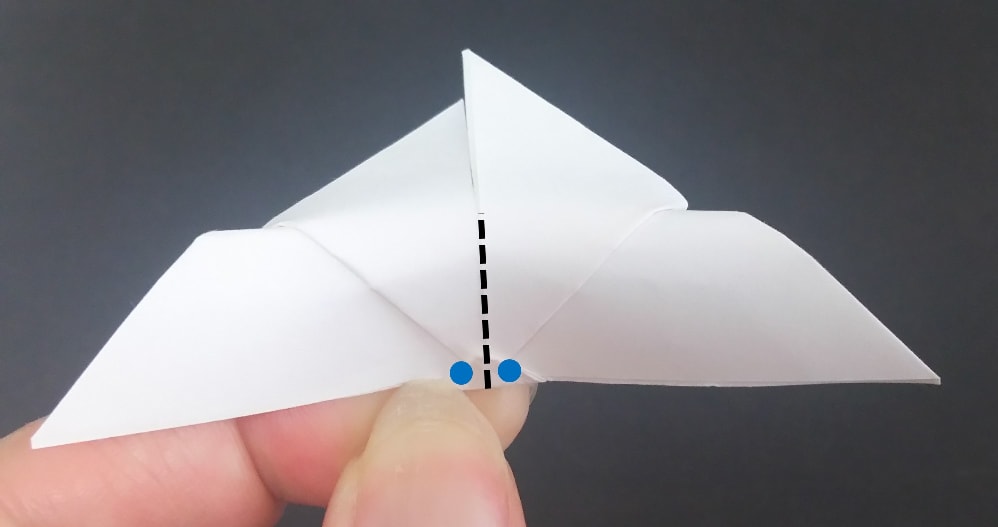
6. Fold in the direction of the arrow at the position of the dashed line on only one side.
7. Fold it in the direction of the arrow at the broken line. (The position of the broken line is almost no problem)
8. Fold it in the direction of the arrow at the half position (broken line).
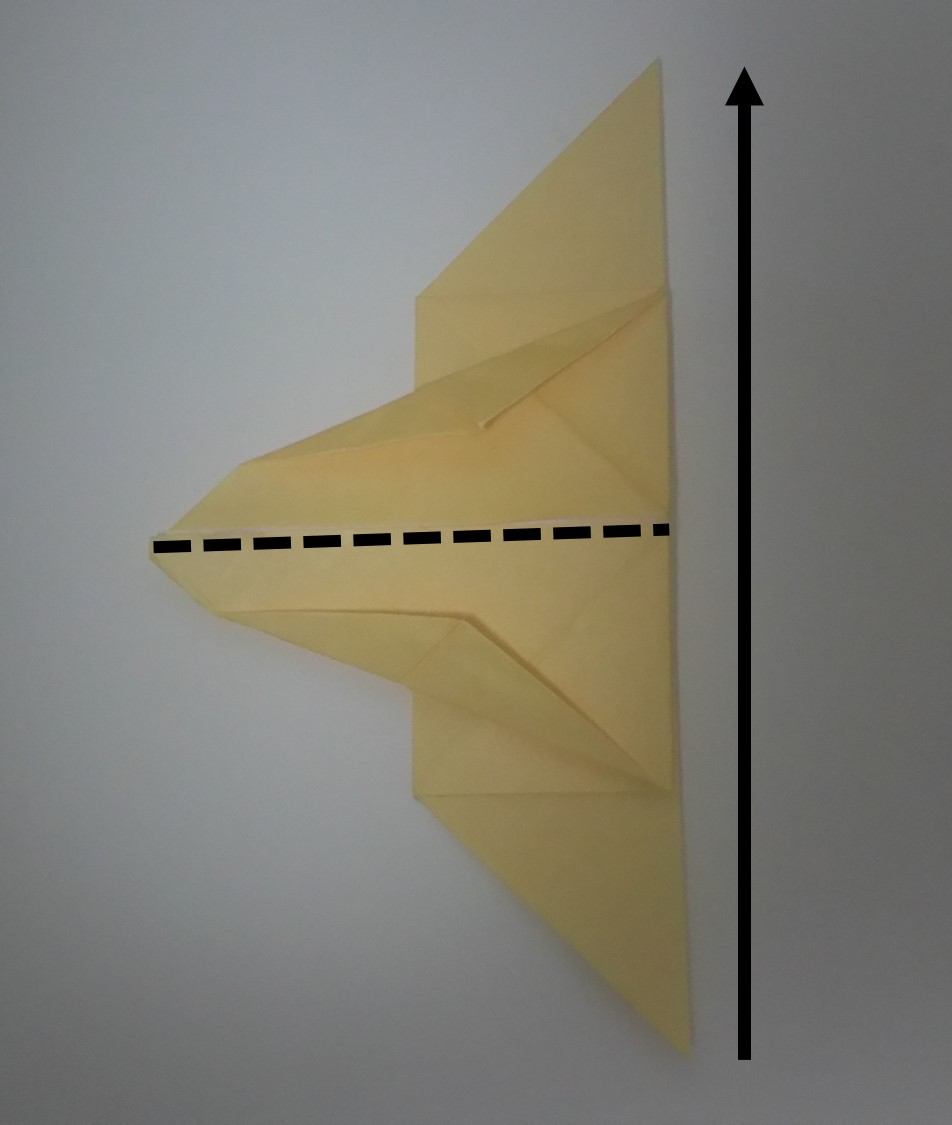
9. Fold it in the direction of the arrow at the broken line. (The position of the broken line is almost no problem)

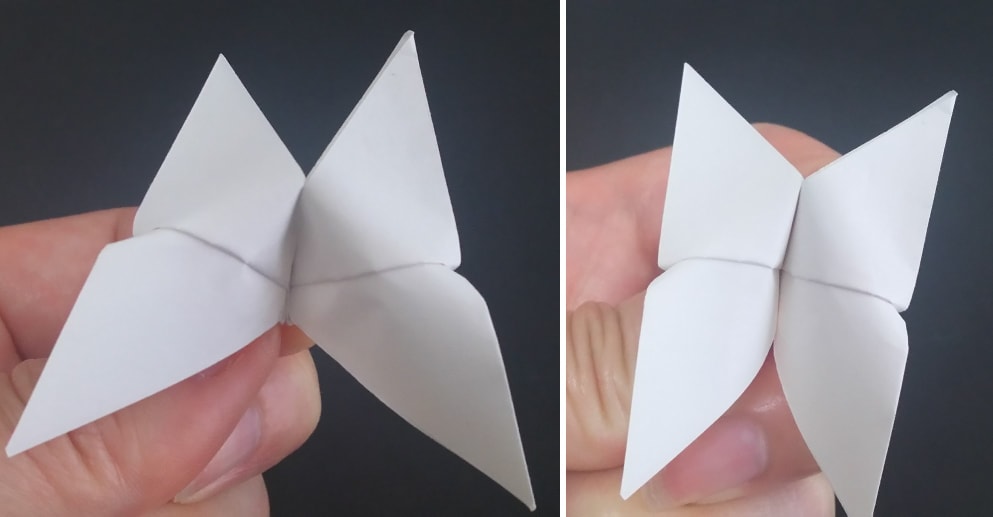
10. Open the part that is folded in half as shown in ② so that the part (broken line circle) folded in step 9 stands up. The butterfly is ready!

How to fold a butterfly (Part 2)
I will make a little three-dimensional butterfly.
This time, I will make it with a white origami, but if there is a color, start folding with the back (white) side up.
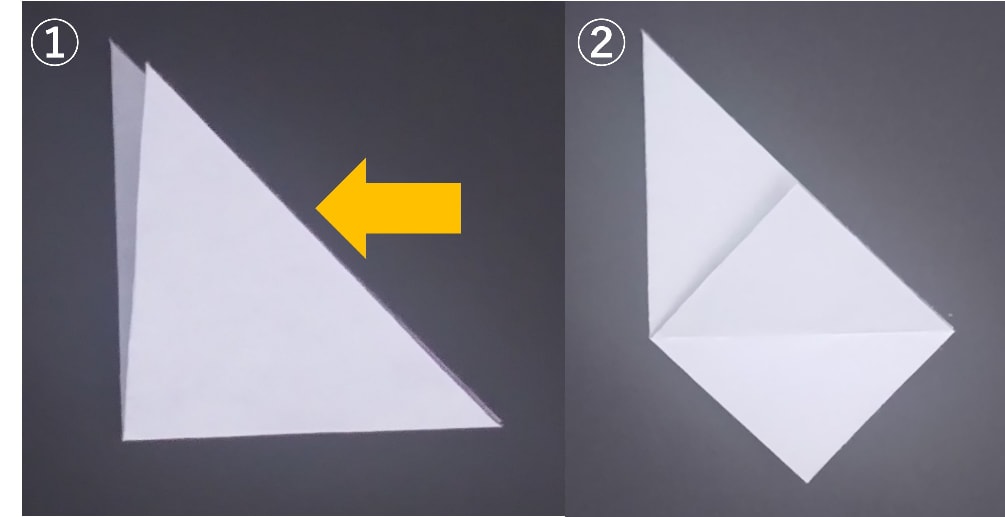
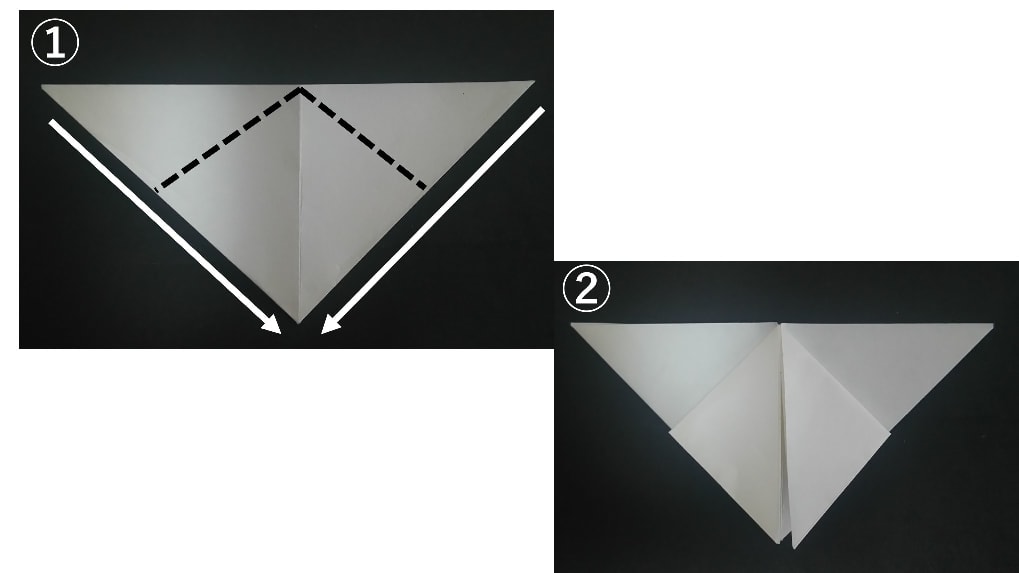
1. Fold it in the direction of the arrow at the half position (broken line).
2. Fold it in the direction of the arrow at the half position (broken line).
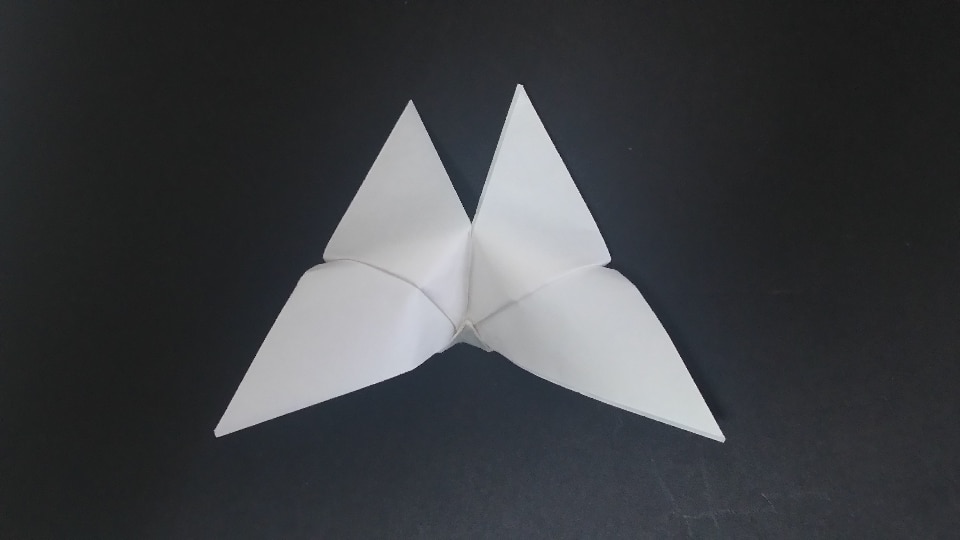
3. Open it while inflating the arrow. Do the same for the back side.

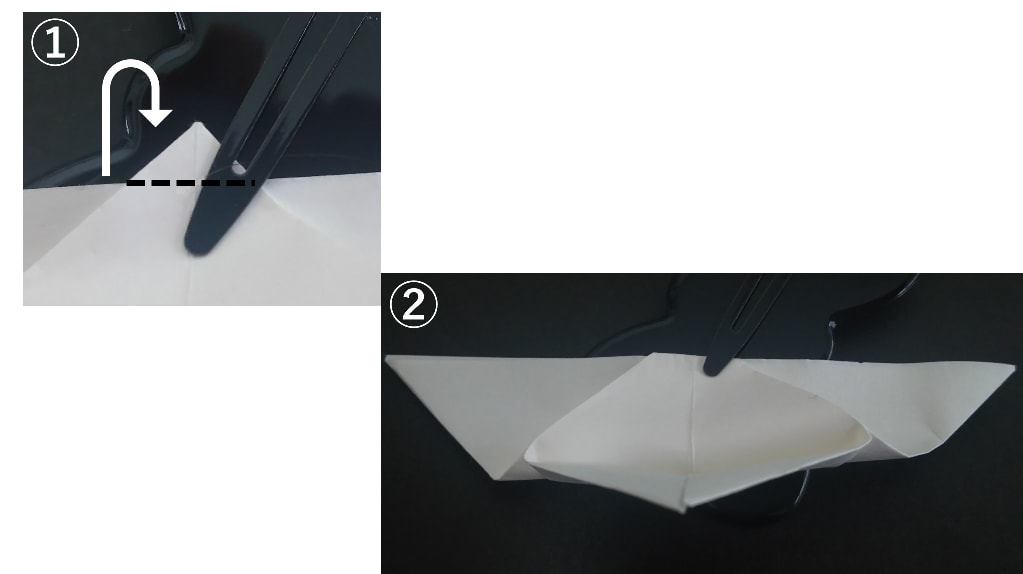
4. Fold in the direction of the arrow at the position of the dashed line on only one side.
5. Turn it over. Round the triangular apex (yellow circle of ①) toward the red circle of ①. (As shown in ②, make it stick out a little. There is no problem with the width at which it sticks out.) The point here is to fold it instead of fold it.
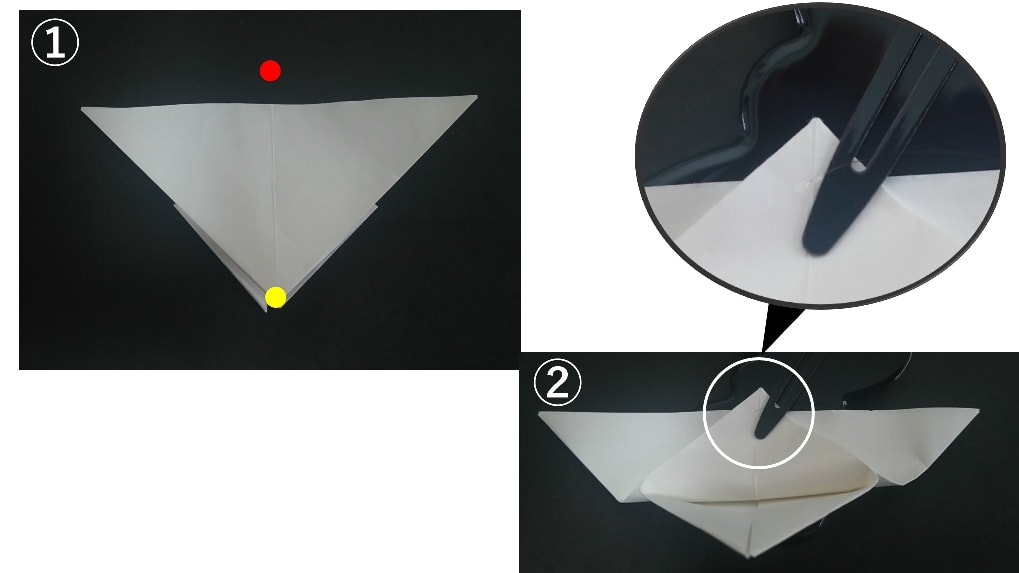
Since it is rounded, it looks like this when viewed from the side.
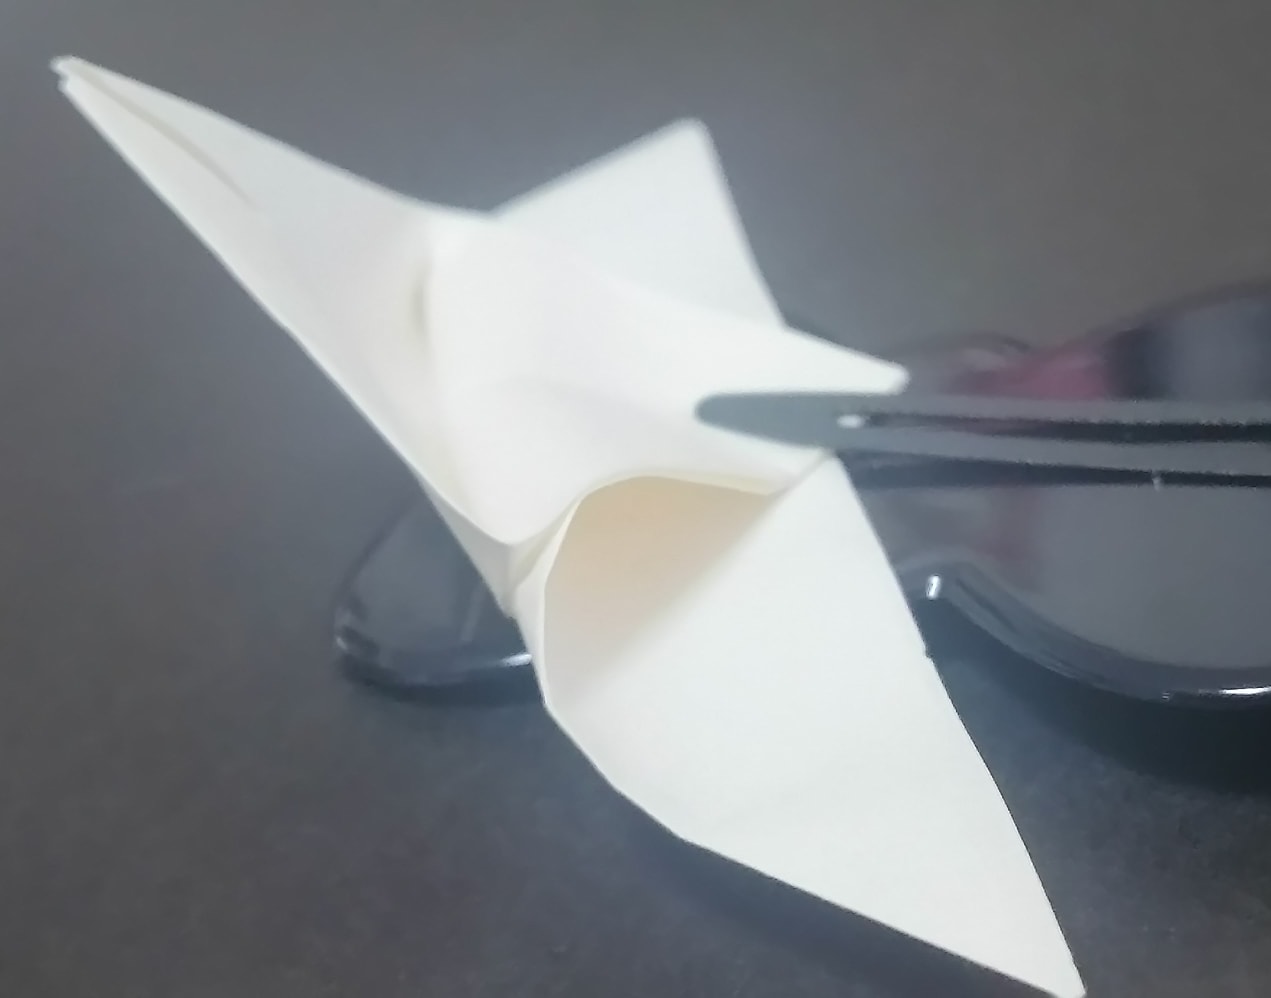
6. Fold the protruding part to the opposite side at the broken line.
7. Turn it over. Fold it along the dotted line so that the blue circles are aligned. Please be careful not to lose the roundness at this time too!
Fold it firmly so as not to crush it.
8. done! !
combination
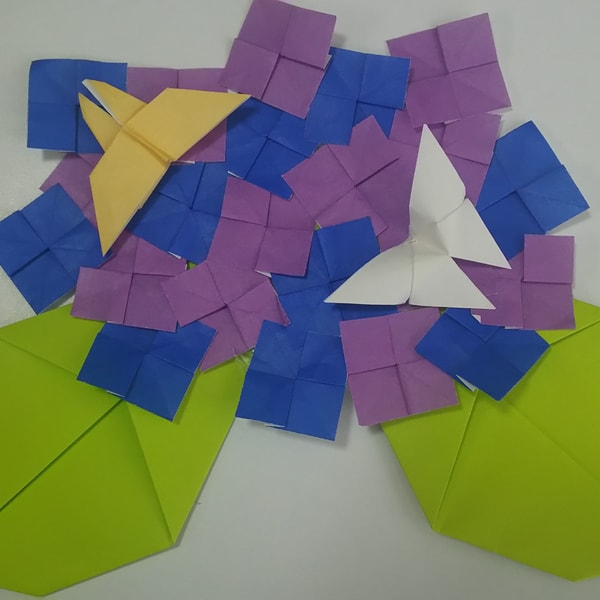
Place the leaves, flowers, and butterflies in that order and combine them.
It may be good to fix the back side with tape or glue so that it will not collapse.

If you make a lot of hydrangea flowers, it will be very luxurious.